THE BLUEPRINT
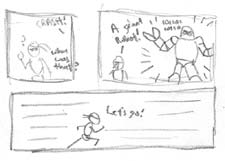
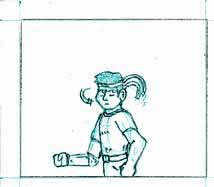
At right, you will see the thumbnail I've worked up for this drawing tutorial. It tells a rather simple story, advances the overall story arc just a tad, and makes an all-round nice sample to work with.
|
| Joe hears a noise and turns around. In the second panel, we reveal a GIANT ROBOT! Then, in panel three, Joe springs into action. |
Now that we have it in thumbnail form, we can translate it into a full-blown comic.
The basic amateur's pencil needn't be anything fancy. A basic #2 pencil will do. Could be wood, could be mechanical. Makes no difference. Even the most poorly-made instrument can be effective if the hands that use them are skilled. (The only time you will really need a specific kind of pencil is if someone else will be inking your work. See "The Committee Factor" below.)
A different grade of paper may be needed depending on your specific needs. If you plan on scanning your comic of pencils and inks, regular white paper (the kind in reams for Xerox machines) will do just fine. If you plan on coloring it with markers, watercolor, or anything else that will cause plain paper to wrinkle or bleed, you may want to use thicker paper, or even cardstock. If you plan on using this as an original to be published or some other professional purpose, bristol board would be best. Acid-free paper archives best.
Amateurs can use whatever variety of erasers they choose. Just make sure it doesn't smudge. Pink pearl is good. Pros like white nylon erasers, gum erasers, and other high-end stuff.
The field is wide open for inks. Use whatever you feel most comfortable using. India ink with brushes or caligraphy pens, inking pens, or even a Pilot Roller. Use what you are confident and competent with. Pros will swear by the Sakura Micron pen. Me, I use Faber-Castell PITT Artist Pens.
Measure the edges of your frames and then connect the dots across the paper. It's okay if the lines go through frames and extend to the edge of your paper. You can always erase later.
MEASUREMENTS
If you are drawing your comic on a 8½" × 11" paper, the margin around your comic should be about 1 cm if you are measuring in metric or ½" if you are measuring standard.
A good size for the gutters between panels is 0.5 cm (¼").
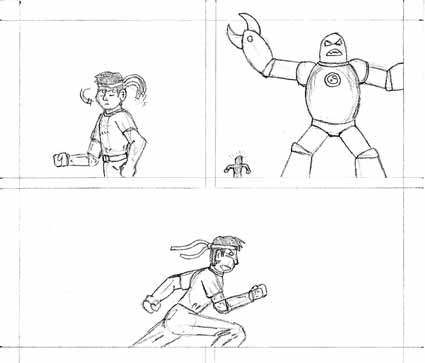
| See the example here. Measurements were marked off at the edges. then, lines were drawn to connect them across the paper. The largest frame at the bottom originally had lines going down the center of it. |
|
BORDERLESS FRAMES
A final note: If you're going to have a frame without a border, it's still a good idea at this stage to draw the border. Just don't ink it. This way, you know where to fit in all the filling of that particular frame.
Next, put "crosshairs" on the skulls and rib cages. On the skull, the horizontal line represents the height of the eyes. It shows the vertical tilt. The vertical line should run down the front of the face, though the eyes and nose. It shows the rotation of the head. The "crosshairs" on the ribcage should intersect at the sternum, and thus indicate the direction the thorax is pointing.
LIMBS
Use sticks to represent the bones of the arms and legs. Attach and pose as needed. You can use small circles to represent the hands, feet, elbows and knees.
EVERYTHING ELSE
Giant robots, important scenery, and other objects could be put in as geometric shapes. You can even do roughs of important facial expressions.
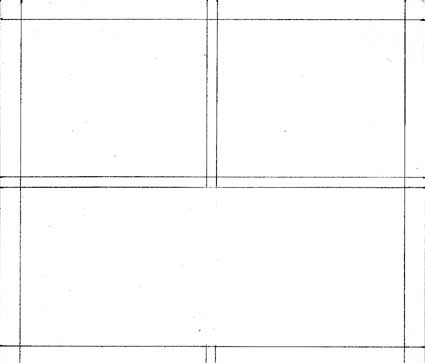
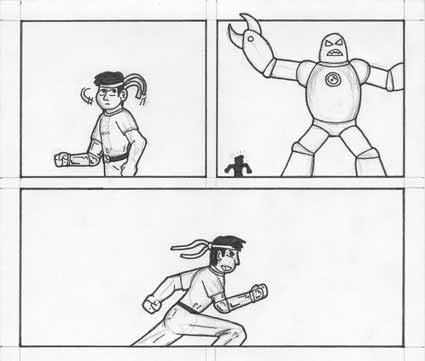
| See the example here. Joe is a skeleton figure that will be fleshed out later. (His cybernetic arm is a bit thicker, though.) The robot's claw extends beyond the panel. It'll be reaching out past the panel in the final version. |
|
A NOTE ON POSES
When posing your figures, their skeletons should be arranged in dynamic ways. If all they are doing is talking, their entire bodies should be expressive of their thoughts: sadness, happiness, surprise. If they are taking action, they should be throwing themselves into the action: off-balance, exaggerated poses.
For the torso, outline the contours of the body. For a buff dude or busty babe, you may wish to add three-dimensional "pads" for muscles or breasts. (This step could also be undertaken in the "skeleton" stage, since that stage deals with basic geometric shapes.)
For muscley arms and legs, add muscular padding. (Again, you could optionally build a muscular skeleton.) For limbs not quite so defined by musculature, just put in the contours of the limbs' outlines. Pay careful attention to proportions and proportion differences between men and women; men tend to have thicker arms and larger hands.
ADD DETAIL
Now that you have the shape of your body, Add the lines and details that define clothing articles. The contours and features of the face should be taking shape, and each character should be showing its distinctiveness.
OTHER THINGS THAT ARE NOT BODIES
Televisions, background items, dumpsters, and whatever else is in in the frames can now be shaped, defined, and detailed. After that, we're ready to start inking.
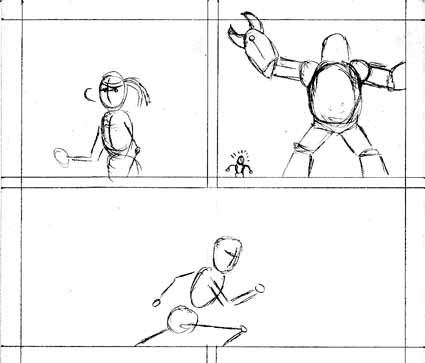
| Referring back to our example, we see the process at work. The details are defined, even though all the skeleton work is still visible. Note that the skeleton work was a lot lighter than the final detail work. This makes it easier to erase, both in case of error and in anticipation of cleanup after inking. |
 |
| This is a simulation of what an "assembly-lined" pencil will look like. When you make a photocopy of this for your inker, none of the blue areas will show up - only the dark grey lead. |
SPECIAL PENCILS For the assembly line process, you will need to do all your preliminary pencil work in non-photo blue pencil. (I use the Austuria Staedtler pencil, available at any art stores.) This type of pencil will not photocopy. Do your skeletons in this pencil, then do the "fleshing out" in this pencil. Do the final outline and detail work with a regular lead.
MAKE A COPY
Use a photopier to make a copy of your original pencils. You can go to Kinko's or the UPS store to do this. If you have a copy machine at your day job, then you could probably mooch one or two copies without raising too many eyebrows. NEVER, NEVER, NEVER let someone else ink your originals! If they make a mistake on a copy, you can run another copy and have them start on a second copy. If they mess up your originals, it means more work for you.
...OR MAYBE NOT
If your originals are on bristol and you need inks on bristol, you may have problems. Copying onto bristol or cardstock may be more expensive, or the copy machine you use may not accept media that thick. Adapt and try to find a solution that suits your group.
INKS WITH A BRUSH OR CALLIGRAPHY PEN
Doing this requires skill. You have to take care not to drip ink anywhere, and at the same time, control the thickness of the lines. You can use a brush pen, brush, or calligraphy pen in combination with the standard pens to achieve different effects on different areas on the page. Experiment and see works well for you.
THICKNESS OF LINES
Whatever particular figures (items or people) are supposed to be important, you may want to outline them with thicker lines that are used to draw in their details. It will help to separate them from the background and draw attention to them. Objects in the foregournd, if you like, could be outlined and detailed even thicker to bring them to the forefront. Experiment with different thicknesses for different purposes and see if you can achieve the effects you want.
|
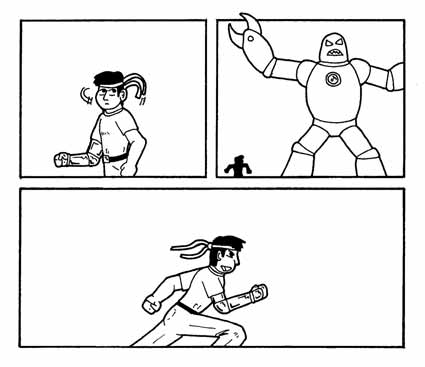
| Here, you can see the inking has been done. Black areas have been filled in and important figures have thicker lines around them. This helps to separate the positive space (the figure) from the negative space (everything around the figure). |
|
Alrighty, now! The art is done! The comic has now been birthed and is ready for the world, right? NO!
A physical piece of art will not be broadcast through the cosmos. It will not travel though a phone line or a cabel modem. If you want to put it out for all the world to see, you need to convert it from paper to pixels. In the next tutorial, we will talk about scanning, sizing, and touching up the artwork. |
Continue on to Scanning Your Art!
|
|
"Active Stupor Heroes" is hosted by
Comic Genesis, a free webhosting and automation service for webcomics.
All material on this site is copyright 2002-2006 by me: Jason Tucker.
|
|


