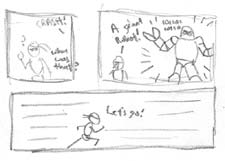
We plotted out our ideas and planned the layout of the comic strip in thumbnail form. Sketching thumbnails is a good idea. [Find out why.]
|
SKETCHING THUMBNAILS
We plotted out our ideas and planned the layout of the comic strip in thumbnail form. Sketching thumbnails is a good idea. [Find out why.] |
|
|
THE ARTWORK PROPER
After carefully measuring out the panels and filling them with skeletons and geometric shapes, we fleshed everything out and added detail. After that, we inked over the pencils and erased the extra pencil lead. [Review the process.] |
HOW TO GET THERE
In a Windows environment, most programs have scanner acquisition under the "File" menu.
|
|
| Adobe Photoshop is the standard by which most other graphics programs are judged. | Microsoft Paint is a graphics editor, but is very basic and does not support layers. You also may not be able to convert among many file formats in earlier versions. |
 COLOR OUTPUT
The color settings, or "output type," depending on the type of scanner you have, is an important thing to take into consideration. Look at your physical artwork and ask yourself how you would best describe it. Color Image: If your artwork is already in full color, then you want to scan it in all its multichromal glory. With lots of subtle shades and tones, you likely want to scan it in "16-bit"/"thousands of colors" or "truecolor"/"32-bit/"millions of colors," the highest color settings. If you have a flatly-colored piece, like a Sunday comic strip or a cel-animation appearance, then you may wish to scan in "8-bit" or "256 color" mode. Greyscale Image: If you've used shades of grey marker, ink wash, or if you are leaving your artwork in an uninked, pencil-shaded style, then you should scan in "greyscale" or "256 grey shades" rather than in color. Black & White Image: DO NOT SCAN IN BLACK AND WHITE! Scanning in "1-bit"/"black and white" will result in pixelated, rough edges on all your lines. Instead, scan in a high-contrast "greyscale" mode. This allows for a few grey pixels at the edge of your lines to create the illusion of a smooth boundary between black lines and white backgrounds. This is called an "anti-alias" effect. |
 BLACK AND WHITE SETTINGS
If you have an "anti-alias" setting, make sure it is turned ON. If you are scanning a black and white image with the "greyscale" setting, then you must make certain adjustments to make sure that your artwork does not have any unexpected grey areas. The white parts should be vibrantly white and the black parts whould be darkly ebon. To accomplish this, crank up the contrast. Turn it up. Set the "midtones" as low as possible. Turn the white level way up and the black level way down. If your scanner's programming allows you adjust the "tolerances" of grey levels, adjust the tolerance such that it takes on a sigmoidal ("s-shaped") appearance.
|
 ONE LAST SETTING
How big of a digital file do you want, in terms of sheer surface area? That's going to depend on just what you want to do with your soon-to-be-pixelated artistry.
If you plan on altering your artwork digitally and then submitting it for publication or printing, you're going to want to have a big file to cut down on the loss of fine details. Scan at least at 600 DPI.
If you plan on digitally altering your art for the web, a smaller resolution will do, usually 200-300 DPI.
If you are just publishing it on the web as is, go with 75-100 DPI.
MINOR DETAIL
If you're skimping on materials or just had inspiration strike at an odd moment, you might have done your comic artwork on the back of a worksheet or memo. Depending on the scanner you have, it may end up showing through the back, giving the faint impression of backwards typing superimposed over your comic. The same may be true if your scanner (like mine) has a sleeve for scanning photo negatives. What do you do?
To protect against the text of a memo, printout, worksheet, flyer, or whatever, place a sheet of black construction paper or black cardstock on top of your comic before closing the scanner lid. This will disguise the writing on the back. For the negative sleeve, use either the black cardstock or a white piece of cardstock. Either one will work.
NOW SCAN!
Click "scan" or "accept" or whatever, and then watch the moving lights. Do it! Do it now!
|
TRIM THE FAT
As you may have noticed, the perimiter of your comic had a thick gutter around the edges. The reason for this was to protect your image. Against what? Wear and tear on the edges, wrinkling, dog-earing of corners, and the dreaded condensation rivers that can originate from cold beverages.
GIMP, PHOTOSHOP, OR PAINT SHOP PRO
MS PAINT
|
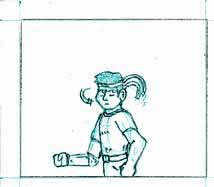
 There were some lines below the headband tails that were supposed to convey movement. They just didn't look right and seemed extraneous. I got rid of them. |
 ARE YOU DONE YET?
I'M DONE!
Size it to whatever size you expect the viewer to see it at. Be wary of sizing it too big. It'll be murder for modem users to load and may not fit in the browsers of some viewers if their monitors are set to lower resolution.
I'M NOT DONE!
If you plan on coloring, lettering, screentoning, or doing anything else to your comic, then don't set it to the final size yet. Set it to double or 2½ times the final size. The magnification will allow you to do better detail work with your modifications.
I'M DONE!
After sizing your monstros... erm... masterpiece, it's ready for the world. If you have black and white or few-color (256 or less) pallette settings, or large splotches of homogenous color, a GIF file would be best.
If you have a high-color file, or a detailed greyscale image, try a JPEG. Most image editors will prompt for a compression factor when saving as a JPEG. Choose a factor that shrinks the size of the data file, but not so much that it causes too much loss of image quality.
I'M NOT DONE!
Save as a file type that is not "lossy." GIFs and JPEGs use algorithms that compress the data. As a result, there will be a loss of image data. Repeated saving in those formats will cause deterioration in the image quality.
Also, save as a file type that supports layers. Without layers, it will be difficult to add screen tones, colors, shading, and the like without running the risk of destroying your original image. Bitmaps (BMPs), TIFFs (most of the time), and PNGs do not support layers.
Each image editing program will usually have its own file type. PhotoShop has PSD files, Paint Shop Pro has PSP, and sometimes they can interconvert between them. Whatever special file type your program uses, use that one for now.
|
Okay, so here we are. You've just digitized your masterpiece and now you're ready to share it with the world...
...or are you? Do you want to add some whizz-bang special effects? If so, you may want to investigate CG shading or coloring. Perhaps you'd like to journey into the realm of digital screentones. |
Continue on to Using Digital Screentones!
|
|
"Active Stupor Heroes" is hosted by
Comic Genesis, a free webhosting and automation service for webcomics.
All material on this site is copyright 2002-2006 by me: Jason Tucker.
|
|